Animate Sequences! PS/IR Guide & More (Image Heavy)

For the n00bs of cel collecting and production art . . . and for some of us old-timers, too. Post your questions on anything that puzzles you.
Post Reply
User avatar
redwolf
Kuwabarakuwabara - Oh My God!
Posts: 628
Joined: Mon Jul 18, 2005 3:01 am
Location: AZ, USA
Contact:

Animate Sequences! PS/IR Guide & More (Image Heavy)

Post by redwolf »

Introduction

Have you ever seen relativly cheap or compelling cels from the same sequence?

Though I no longer own them, I once bought sixteen cels from two sequences at 200 or 300 yen a pop.

Have you ever bought a full cut of sketches because you loved the character or scene? And when you got the set, wondered what the heck you would do with twenty partial sketches of mouths and eyes?

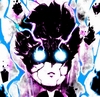
I can't throw them away, that's terrible! That's discarding fantastic art like this:
Image

What can we do? Use them as scrap paper for grocery lists? Fold them into elaborate origami animals?

No! We animate them! Once you've fully stepped into the world of animating your collection, those mouths you once considered recycling will become beautiful.

I'm going to start with the programs I know, the prehistoric Adobe Photoshop 5.5 with ImageReady. Despite its age, some of the principles should be the same as newer versions, or even other programs. You may find that I explain some things that you already know. This is because I tried to make as few assumptions as possible. I'll add information on other programs as people volunteer information or if I do some research and experimentation.

The example I am going to use below is a set of douga, however, please keep in mind that a similar process can be used on any sequence or partial sequence of cels, genga, roughs, and so on.

There are five main sections to this guide:
Step One: Scan (Or Photograph)
Step Two: Prep Work
Step Three: Animate
Step Four: Optimize
Other Programs


Now, before you start on my tutorial, please note the following advice:
1. Have plenty of food or drink at the ready.
2. Be prepared to take breaks...a lot of breaks, particularly if you've got a massive cut sequence on your hands.
3. Don't get frustrated....take a break and watch some anime! Then come here and post about how bloated my tutorial is and point out what part sounds like alien gobbledygock. Maybe I can clarify, or perhaps someone else can explain in two sentences what took me twenty paragraphs.


STEP ONE: SCAN (or Photograph)

Acquire pictures of all the artwork involved in the animation. This includes those formerly "worthless" sketches that were only of mouths, eyes, hair, etcetera.

Do whatever you can to scan your artwork instead of photographing. Buy, borrow, rob, steal, maim. Scan them as best as possible. I put a couple magazines or books on top my closed scanner lid, because when I close the scanner lid with no "weights", my scans tend to have more shadows to them.

If photographs are your only option, try to take the clearest photo possible, and remember that it will be harder to make a smooth animation and optimize (minimize) the size of the final animated image file.

On Registration Holes

When scanning (or photographing), try to make sure that at least part of the registration holes are visible. Registration holes are the best way of making sure everything is aligned. It's what the animators used, after all.

I can scan most of the image in one go, if I turn the sketch sideways. However, the registration holes are usually completely cut off. You might be able to make a decent animation without using the registration, so long as all of the sketches or cels are the same size.
Image
Douga A-6: Sonsaku Hakufu of Ikki Tousen

I've always preferred to scan the entirety of a cel, sequence number and all. Unfortunately, virtually all of the reasonably priced scanners on the market today are 12x8.5 or 14x8.5 inches. Production sketches are 10.75x9.5 inches or larger (barring recent widescreen sketches, which are about 12x8.25 inches). This means double or triple the work to scan two halves of a cel/sketch and stitch them together. However, having the entirety of a sketch scanned is important to perfecting the animation.
Image + Image
+ Alignment of layers + Eraser used on the edge of the top layer =
Image

On Saving Image Files to be Used in ImageReady
--Also about Resizing Images

Make sure to name the production files in order.
For example:
dougaA01.psd
dougaA02.psd
....
dougaA12end.psd
dougaB01.psd
dougaB02end.psd
....

The leading zeroes are important...otherwise you'll find that A10 comes after A1 and yet before A2 through A9.

You can use a different type of image file, but I recommend Photoshop files over jpegs and GIFs to maintain quality.

Check the size and number of your files! If you have fifty douga files scanned in at 300dpi, you probably need to resize each and every one of them. Save the resized images in a new, well-named, easy to find folder so as to keep the original scans. Think of your computer's feelings, because it will have to open all of these files at the same time!

Always resize using percent (with proportions constrained). This resizes all of the images in the same way (as opposed to picking a random pixel number). It keeps cel or sketch sizes consistent with one another, no matter how you cropped the images or whether any genga had registration holes realigned with scissors and tape.
Image
I normally scan at 150 dpi and resize to 40%. If you want something larger, play around with what percent works for your images & computer system. For my example this time, I actually went for a slightly greater percentage that resulted in an image width of 795 pixels.

If your pictures seem blurry after resizing, try to sharpen the image. If you are using Photoshop go to the menu bar Filter > Sharpen > Unsharp Mask
Image
Play around with the settings if necessary. I normally use a percent from 30% to 50%.
Last edited by redwolf on Tue Oct 09, 2007 1:59 pm, edited 1 time in total.
User avatar
redwolf
Kuwabarakuwabara - Oh My God!
Posts: 628
Joined: Mon Jul 18, 2005 3:01 am
Location: AZ, USA
Contact:

Step Two: Prep Work

Post by redwolf »

STEP TWO: PREP WORK
Using Adobe ImageReady

True to many things, the more prep work you do, the better your animation will look and the easier certain aspects will be.

Here are the images I will be using.
Image

There are a few ways to get your scans into ImageReady. You can import a folder of images. You can open a Photoshop file that already has all the necessary scans as layers. You can copy each individual image from another program and paste into ImageReady until all the sequence images are layers in one file. Since I save all of my files separately, I am going to discuss the import method.

Importing into ImageReady

From the top menu bar: File > Import > Folder as Frames...

This method does some work for you: it creates one layer AND one animation frame for each file that is imported.

Woohoo! We already have an animation!

This is your Animation window (if it is not showing, go to Window > Show Animation)
Image

Hit the play button. Does your animation look a little...fast? It's because each frame is set to 0 seconds or no delay. I'll talk about how to slow down the animation below, under "Frame Delay".

If your animation artwork sequence only has an A layer (no B, C, etc), and if you are happy with the way it looks, don't want to mess around anymore or accidentally blow anything up, then blast past the rest of this section and part of the next (Step Three: Animate) until you hit Frame Delay. Keep in mind you'll be bypassing my explanations of both alignment and clean-up.

Otherwise, you may noticed a few problems already. 1) The afore mentioned speed. 2) Artwork and registration holes jumping around. 3) If there is more than one layer (A, B, C, etc.), the auto animation goes in sequencial order...A1, ...A12end, B1, B2end. The layers need to be combined manually.

Here's a smaller version (450 pixels wide) of what my animation looks like at this point:
http://img461.imageshack.us/img461/8700 ... u01ew1.gif
(linked for size--700 KB!)

Not only is it fast, but it is a bit strange to see Hakufu instantaneously lose her hair and then be replaced by her hair. Although, the potential to see bald characters is part of the fun of cel and sketch layers. :D

All right, now that you've seen all of those lovely animation frames in the animation window? Say goodbye, because we're going to be deleting all of them. When it comes to aligning registration holes or changing layer settings, it's easier to start the animation from scratch.

Select All Frames
Image

Delete. Despite the fact that all the frames are selected, the first frame will still remain (a Good thing).
Before.
Image
Image
After.

====================================

I am combining the following three tasks, as they each cycle through all (or most) of the cut sequence layers. You may find you prefer to do one task at a time, cycling through all of the layers...or perhaps something else entirely. Once you've learned the basic steps, don't be afraid to experiment.

I) Aligning by Registration Holes

Perhaps it's not a big deal to you if characters' eyes are hopping a bit around their faces. However, if you're willing to spend a little time to fix things up, the difference can be anything from subtle to huge. If you're satisfied with the alignment or want to save the time, then you can skip the following steps: AAA, BBB, and CCC.

II) Clean-up

Maybe you already cleaned up your images, right after you scanned them in... in which case, skimming over DDD, --1) and --2) may work for you and your cut sequence.

And

III) On Multiple Layer Sequences
The ABCs, I mean, BCDs of Animated Cuts.

Did you say you had multiple production art layers (A, B, C, etc.)? There's something else I'm going to have you do that will make life easier later on (step EEE).


First off, some checking. Does your Layers window look something like this? (if it is not showing: Go to the top menu bar... Window > Show Layers)
Image
Make sure the eye only appears next to the first layer (A01). This is the indicator of whether a certain layer is hidden or visible in the main image.

If for some reason, this is not the case, in the Layers window, right click on the eye next to the A01 layer and select "Show/Hide all other layers".
Image

It's best to align every single layer to the A-1. If you align A-2 to A-1, A-3 to A-2, A-4 to A-5, etcetera, your layers can gradually end up more misaligned than they were in the first place.


AAA) Are you working on A01/A-1? If so, skip way down to DDD.
Aligning Registration Holes #1 START

Change the layer opacity of the layer you are working on to 50% in the Layers window (this screenshot is slightly enlarged).
Image
This makes the layer you are working on semi-transparent...so you can see both that layer and the A01/A-1 layer at the same time.

This is what my middle registration holes look like. They're a little off... (slightly exaggerated for dramatic purposes!)
Image

The first of your registration holes may look perfectly aligned, but please finish reading through these steps, anyway!

NOTE: It might help to "Zoom in" to about 200% or 300%. Use the menu bar to go to View > Zoom In. Be sure to scroll up the picture until you can see the registration holes on the screen again (preferrably the middle registration hole).


BBB)
Aligning Registration Holes #2

Every single time before you move your image around, make sure that you have the correct layer selected. You don't want to move around A01 when you're trying to align all of your other layers with A01!

Look for your Tools window. If it isn't showing, use the menu to go to Window > Show Tools
Select the Move Tool.
Image

You can either use the mouse to move the image or the arrow keys until the two overlapping registration holes become one.
Image


CCC)
Aligning Registration Holes #3 END

Before moving on to the next layer, always remember to change the opacity back from 50% to 100% in the Layers window.
Image

If you zoomed in remember to zoom back out so you can see the whole image at once. View > Zoom Out


DDD)

CHECK POINT! Are you working on A01/A-1?
-YES: skip to --1).
-NO: Did you change levels on A01/A-1? If so, go the main menu bar: Filter > Apply Levels. The same Levels settings will be applied to the current layer. If "Apply Levels" isn't under "Filter", don't worry. Either use the "Levels" settings you saved earlier or try to approximate a similar result through Image > Adjust > Levels... When finished, skip to --2).


--1) A-1 layer clean-up.

Look out for shadowing, smudging, etcetera, on the scanned image (often on the sides, corners, or near the registration holes). If your image looks clean, great! Skip this mass of text and head to EEE.

First, I recommend playing with Image > Adjust > Levels.
Image
The numbers showing are the numbers I ended up applying to each of my douga layers. They may or may not work on your cut sequence, so move those arrows around and experiment! I find the two circled arrows to be the most helpful when it comes to getting rid of light shadows, yet maintaining the intensity of the lines. If you don't like what's happening, you can always "Cancel" and start over again.

Be careful not to distort your image too much! It's better to leave some shadow in or attempt to get rid of it manually than it is to completely alter your picture.

Make sure you only change your A-1 layer using "Levels" once. If you use it two or more times, you won't be able to easily apply the same settings to your other layers. If you do not apply similar settings to each layer, your images will become inconsistent from one another, and your animation will be harder to optimize later on. Remember the settings you used, just in case...either write down the numbers or save a screenshot of the Levels window right before you hit "OK".

Now, move on to --2).


--2) Clean-up.

If you are more knowlegable about Photoshop or as you learn and experiment more, you can manually clean up some shadows/spots using tools such as the paintbrush, lasso and eraser tools.

When using the paintbrush tool, make sure that the foreground color in the Tools window is consistant with the main color of the paper/background.

When using the lasso or eraser tools, make sure the layer you are working on is on white paper and will never rest over another sketch that is on color paper. (Typically with scanned cels, this is the case, since they are clear). During the animation, it would look strange to see patches of color pop through the areas you erased.

If you are unsure, I recommend sticking to the paintbrush tool. With the paintbrush, you can even create a new layer (Layer > New > New Layer...) above the one you wish to clean up. Just make sure that the correction layer is always visible when the corrected image layer is visible. Or you can just merge the two layers together for simplification.

Now, Skip to EEE


EEE)
Multiple Layer Sequences

CHECK POINT! Are you on an A-# layer of your cut sequence? If so, then skip to GGG. If you are on a B-# layer or higher letters, pay attention; this step will help you out in the future.

Here is a C-1 end sketch.
Image
It is supposed to appear over an A layer sketch with the three other characters present in this cut.

Change the "Blend Mode" of the layer from "Normal" to "Multiply"
Image
Image

Wait a minute! I can see through my characters! If your cut sequence has characters on different layers, this is probably going to be the case. For now, don't worry about it; we'll take care of it later on under STEP THREE: ANIMATE.


FFF) Now, to move on to align the next layer... If you were NOT working on A-1/A01, in the Layers window, click on the eye next to the layer you just aligned/cleaned (this is the layer that is currently highlighted). This layer should disappear from the image screen, and you should only see A01 (A-1) again.
Image

If you were working on A01/A-1, then you don't need to hide any layers.

Now, click on the name of the layer immediately above the layer you just finished working on. If you just finished A-1, this should be A-2 (or B-1, if you have an A-1 END).
Image


GGG) Now, cycle back up to AAA, rinse and repeat until you've finished aligning and/or cleaning up all of your image layers.


Once you have finished entirely, the A01/A-1 image should be the one showing in the image frame. If not, in the Layers window, scroll down (if necessary), and right click on the "eye" left of the A01 (A-1) layer and select "Show/Hide all other layers".
Last edited by redwolf on Tue Oct 09, 2007 2:00 pm, edited 1 time in total.
User avatar
redwolf
Kuwabarakuwabara - Oh My God!
Posts: 628
Joined: Mon Jul 18, 2005 3:01 am
Location: AZ, USA
Contact:

Step Three: Animate

Post by redwolf »

STEP THREE: ANIMATE
Using ImageReady

Now, we're going to get down to actual animating!
Finally!

I'm going to assume you already know where your B, C, etc. layers are supposed to show up in the sequence. If you've got a timing sheet with your sequence or know where to watch your sequence in the actual episode, those will help clue you in.

With my particular cut sequence, the B layer sketches don't kick in until A-8 end. With some cuts, one scetch for multiple of the layers is already present. For example: A-1 is the character's face, and B-1 is the character's mouth. This is often true for sequences where a character talks.


Click on the "0 sec" beneath your only frame in the Animation Window. Change it to a number of seconds...my examples show "0.1 seconds", but I actually recommend 0.2 or 0.5. This will slow down the animation frames when it comes time to playback, making it easier for you to see whether anything is wrong and where the errors are.

With my sequence, the only sketch that appears in the first frame is the A-1, so my first animation frame is already complete.
Image
Click on the "Duplicates current frame" button on bottom of the Animation window.

Now you have two identical frames. Again, beneath your frames will probably be "0.2 sec" or "0.5 sec".
Image
If you hit the Play button in the Animation window, nothing will happen except the animation frame that is highlighted (shadowed) will keep switching from 1 to 2. Hit the square Stop button, and make sure the frame you just created is the one that is selected (click on it, if it is not).

Now, look at the Layers window. Click on each cut sequence layer that should be visible in the second frame. Make sure an eye appears next to each of these layers. If any layers are visible that are not supposed to be, make sure to hide these layers.

In my cut sequence, only the dougaA02 layer (A-2) is visible in the second frame.
Image
As the dougaA02 would cover the dougaA01 layer, it's not essential to hide the dougaA01 layer, but it is a good habit to keep--less clutter.

I repeat these steps for dougaA03 through douga A07. Easy!

When I get to dougaA08end, my bald Hakufu, I get to the challenge. I know dougaB01 also appears in this frame, so I click on it to make it appear.
Image
If step EEE of the Prep Work section was properly done, the B layer should appear, and yet the A layer should still be visible. If not, you need to change the blend mode of the B layer from Normal to Multiply (scroll up to EEE if you need details).

We're back to douga overlap A.K.A. ghost characters (and hair, in this case). If you're lucky enough that this doesn't apply to your set of sketches and cels, breathe a huge sigh of relief and finish creating your animation.

Dealing with Overlapping layers
We're going to create a new layer to hide that unsightly overlap.

From the top menu bar: Layer > New > New Layer...

Give it an appropriate name so that it is easily identifyable! With my sequence, it is my dougaB01 that is overlapping my dougaA08end, so I am going to name my new layer "white B01". Something like "concealer B01" would work too, if you want to think of makeup or whatnot. Be creative!

Image
Most likely you had the top overlapping layer selected, so the blank new layer appeared above this. You need it to appear just below the top overlapping layer, otherwise, when you try to hide the unsightly overlap, you'll be hiding the entire picture instead.

Click on the new layer and hold down that left mouse button as you drag the new layer immediately below the top overlapping layer.
Image

Now, select the paintbrush tool on the Tools window.
Image

Make sure the foreground color is white (This is on the bottom of the Tools window).
Image
If it is not, double click on the foreground color and use the Color Picker to change the color to white.
PLEASE NOTE! If the bottom sketch that is being overlapped is on colored/non-white paper, the foreground color that you use will need to be the same as the color of the bottom sketch's paper. This probably won't be a concern for you as most douga and genga are on white paper. Some exceptions might be shuusei (corrections--these are always on thinner colored paper, often yellow paper) and photographed images where it was impossible to make the background color of the paper completely white (without washing out the images).

Check on which type of brush is selected. If you can't see the Brushes window, go to Window > Show Brushes.
Image
Use one of the brush types that doesn't have a blurry edge to fill in the area which is overlapped. Change sizes depending on the area that needs to be filled. Don't worry if you make a mistake: since you are working on a separate layer, you can always erase. Speaking of that...always make sure you're on the right layer before going to work! I accidentally switched from white B01 to dougaA08end, and had to backtrack and do everything over again.

What helps me is continuously showing and hiding the lower layer(s) by using the Layers window. This helps me see what lines should be covered by white. Pay attention to the other frames and images in the sequence. I whited out the entire overlap at first, only to notice that A-1 through A-7 had the eyes and eyebrows visible through Hakufu's bangs.
Image

Here's the white layer only, to give you an idea. I only do the minimal necessary...there's no need to treat it like a coloring book. In fact, you can even go over the lines in some places, and no one will ever notice, because the white blends into the background.
Image

Unfortunately, when I go to create my next frame, I have to hide white B01 along with dougaB01 (think of them as being permanently superglued to one another), which means I need to create an all new white/concealer layer for the places dougaB02 overlaps dougaA08end.

Here is what my frames will be:
Frame # -- Layers present
1 -------- A01
2 -------- A02
3 -------- A03
4 -------- A04
5 -------- A05
6 -------- A06
7 -------- A07
8 -------- A08end + B01 + white B01
9 -------- A08end + B02 + white B02
10 -------- A08end + B03 + white B03
11 -------- A08end + B04 + white B04
12 -------- A08end + B05end + white B05end

Douga animations can get quite a bit more complex in terms of number of layers needed. For example, the following first frame:
Image
The layers present in this first frame are:
*A-1: The three characters to the left of the little girl.
*B-1: The mouth of the left foreground character with the glasses (Momo)
*C-1 end: The little girl, right foreground (Asami).
*White/Concealer layer to hide the places C-1e overlaps A-1. As C-1 is an end layer, it is the only white/concealer layer needed.
*D-1: Part of the eyes of Asami
*E-1: The mouth of Asami

One unsavory element you might notice when you play back your animation (using the play button in the Animation window) is that the edges hop around. In order to eliminate this, I like to decrease the "Canvas Size" a little bit. Go to the top menu, Image > Canvas Size.
Image
Decrease both the width by something around 4 to 10 pixels. For example, here I might type 789 for the width and 717 for the height. After clicking OK, I play back the animation again to see if the canvas size reduction was enough to get rid of the image edge inconsistencies.


Frame Delay

To change the delay of all the frames at once:
Click on the menu arrow in the upper right corner of the Animation window, and then click Select All Frames. Click below one of the animation frames, on the text "# sec". The # will probably be 0, 0.1, 0.2, or 0.5. A list of numbers will appear, indicating an amount of time in seconds.
Image

0.1 seconds is good for approximating how a cel or douga cut sequence might have looked in the show (this is my personal preference for douga as it approximates the actual scene...sometimes I'll shift it a little to 0.12 sec). 0.2 or 0.3 will slow this down a bit, if you so desire.

0.5 or 1.0 is good if you want to let people have a good look at each individual cel or sketch. I think this is best for roughs/genga or cel cuts where only key frames are drawn or for partial sequences.

To change a single frame, click on the frame that needs to be changed, and make sure it is the only one selected (gray highlighting).

2.0 seconds or more is good for the very last frame (pause before the animation loop restarts from the beginning), or for any frame in the middle that needs a pause for effect, I usually like this, as it helps viewers determine where the beginning of the animation is. Sometimes, you'll have animations that look better without an ending pause... Play around and see what looks the best to you.

If you'd like to see my cut sequence using some of these various times right now (0.1, 0.2, 0.5), scroll down to the end of the next step (Optimize), to see a few animated GIFs with varying frame delays.
Last edited by redwolf on Sat Oct 13, 2007 9:03 pm, edited 2 times in total.
User avatar
redwolf
Kuwabarakuwabara - Oh My God!
Posts: 628
Joined: Mon Jul 18, 2005 3:01 am
Location: AZ, USA
Contact:

Step Four: Optimize

Post by redwolf »

STEP FOUR: OPTIMIZE
This section is all about making your file as small as possible, while still maintaining as much pixel size and color integrity as possible. If at any time you are satisfied with the picture in the window and the KB size of the file, your finished animated GIF file will be at your fingertips with a File > Save Optimized As...

Color Reduction
I'll be continuing my douga example. You can do this with any type of sequence, however, you won't be able to get as few colors with cel and colored genga sets.

Douga tends to have only a few main colors: Usually white, gray, red, and blue. Because of this, you may be able to reduce your colors to as few as eight to twelve.

Look for the following tabs in the upper right corner of your main image (they may also be right under the file menu bar)
Image
Click on the "Optimized" tab. The sketch (or cel) picture in the main window will disappear for a moment as the program loads the optimized version of your animation file. This is what your final animation file will look like if you were to: File > Save Optimized As...

Great! Right? Eh... have a look for the following numbers:
Image
They should appear either at the bottom of the ImageReady window, or right underneath the cel/sketch image. In the image above, the 3.32M is the size of the the ImageReady file. The 783.7K would be the size of my "optimized" GIF at this point. That's downright crappy for a twelve frame, thirteen layer animation composed of clean scans. 280 sec is the time it would take a 28.8KB modem to download my 'optimized' file (143 sec for a 56.6K).

If your cut sequence is closer to fourty layers or more, your files are looking a lot bigger and more unweildly. I have a 52 frame, 73 layer sequence...at the same settings as my Ikki Tousen sketch (795 pixels wide, 256 colors, 100% dither, etc.), it comes out at a whopping 2.732 MB without optimization.

Now, look for the Color Table window. If it is not showing, on the top menu bar, click Window > Show Color Table.
Image
The colors you see will be different...these are the 256 colors that ImageReady is currently using for your 'optimized' GIF.

Look for the Optimize window...if it is not showing, go to Window > Show Optimize.
Image
Click on the arrow to the right of colors. A list will drop down with some numbers... mine has 2, 4, 8, 16, 32, 64, 128, and 256. Select the number 8. (You can also type the number in manually.) Note that this number also appears in the lower left of the Color Table window.

Your image should change...anywhere from a little, to all the way down the gutter. Mine wasn't so bad...but if you look close, there is a definite loss of vibrance in the colors. In my experience, ImageReady virtually never automatically selects the best colors. I'm going to show you how to manually select your own colors.
Image

A glance in the corner shows that the size of the file has reduced. Mine went from 783 KB to 364 KB. Not bad, but I'm going to get Hakufu down below 200 KB.
Image

Change the Colors in the Optimize window up to 16--this will give you some room to work. (Remember, if you're working with cels or colored sketches, you may need more)

Now, look for these tabs again:
Image
And click on "2-Up". Now, the main window with your image file should have two screens...left is the original image, and right is the optimized version. This view enables you to select, add, and lock colors from the original, while also comparing the optimized GIF to the original as settings are changed.

On the Tools window, select the Eyedropper Tool.
Image
This tool allows us to grab the colors right off of the image itself.

Since I'm working on a douga set, there's one obvious color to start with. I'm going to click on that grand white background space.

Now, there are two important things to note.

Tools window.
Image
Towards the bottom, you should see the two overlapping squares of the foreground and the background colors. The top square should be white.

The following is only something to note when you need "true" white or "true" black.
Color Table window (slightly enlarged).
Image
There should be a square around the color white. If it truly is pure white, there should be a little diamond in the middle of the square. Only white and black has this diamond/circle.

There's a small number of buttons on the bottom of the Color Table window. The one needed now is: "Adds foreground color to palette"
Image

Click this, and it will do two things.
1) Add the foreground color to the Color Table (if it is not present already).
2) Locks the color in the Color Table.

Locking colors! Even if you change the number of colors again, locked colors will remain. When you have more locked colors than number of colors set in the Optimize window, some of the locked colors will not show up. However, if you increase the number of colors again, they will reappear.

Now, my Color Table looks like this (it is slightly enlarged). The important part is the small square in the lower right corner of the white color square. The presence of that square means that this particular color is locked.
Image

Selecting the best colors to lock--- It's best to select colors when viewing the Original version of the image. If you use the Optimized version, you'll only be selecting the colors that are already in the Color Table.

If you hold down the left mouse button when you click and drag the mouse around, you can sample the colors--you'll see the colors changing in the foreground color square in the Tools window. Try to select what looks like the most common/dominant colors. This is somewhat of a trial and error process. Zooming in (View > Zoom In) can help.

To see whether the current colors work, keep an eye on the optimized right half of the 2-Up window. It might help to temporarily lower the number of colors (in the Optimize window) to be equal or just above the number of locked colors.

Unlocking colors. If there's a color that you don't think works, you can select it via using the Eyedropper Tool on the optimized right half of the 2-Up window or by clicking on the color in the Color Table window.
Image
Clicking on a color makes it become the new Foreground color in the Tools window. Clicking on the picture of a lock on the bottom of the Color Table window unlocks the Foreground color (if it is already locked). The lock button can also lock colors, but only if they are already present in the Color Table.


Experiment with locking and unlocking different colors as well as raising and lowering the number of colors present in the optimized animation file. The goal: the lowest number of colors (and thus, the lowest possible filesize) that maintains most of the integrity of the artwork.

These are the final twelve colors I went with for my optimized animation GIF:
Image
Yours may look good with less, or you may need more colors to keep the integrity of the art.


Image Resizing and Diffusion/Dither

Image resizing can make a big difference. However, it might not be as important, especially if you have no size limitations and want to maintain as large a pixel size as possible. For my gallery, I like to make my images as accessible as possible by optimizing the best I can. I typically resize my animated GIFs to be less than 600 pixels... 500ish is probably the average. I try not to go less than 400 pixels, even if it means I will be unable to get my filesize below 500 KB. Less than 400 pixels wide on a standard-sized sketch or cel cut usually cuts out too many details for my liking.

Image > Image Size...
Here, you can resize either by percent or pixel. The important thing is to make sure the proportions are constrained, so the image resizes in scale and does not become squashed.
http://img72.imageshack.us/img72/86/065imagesizexl1.jpg

Sometimes sequences are just too long, and they will not go as low (KB-wise) as I would like. The worst thing for file size is a sequence that has little 'true' white space. This is especially true for shuusei sequences on colored paper or photographed images, which tend to have gradient shadows.

In the Optimize window...
Changing diffusion settings will lower image size a little bit, and you probably won't really notice a difference. Experiment with lowering the dither down to somewhere between 0% and 50%. You probably won't see too much of a visual difference at 50%. If you do see much of a negative impact, raise the dither back up to around 70%+.
Image


My final results:
Image
194.8 KB, 36 second download at 56.6Kbps modem speed.

0.1 seconds, no delay on last frame
http://img222.imageshack.us/img222/7739 ... fsmmi6.gif
No delay on the last frame means that the animation is slightly dizzying.

0.2 seconds, 2.0 delay on last frame
http://img222.imageshack.us/img222/7582 ... sm2cj6.gif

0.5 seconds, 2.0 delay on last frame
http://img222.imageshack.us/img222/2848 ... m45es9.gif

0.1 seconds, 2.0 delay on the last frame.
http://img222.imageshack.us/img222/1093 ... sm3kk5.gif
Last edited by redwolf on Tue Oct 09, 2007 2:06 pm, edited 1 time in total.
User avatar
redwolf
Kuwabarakuwabara - Oh My God!
Posts: 628
Joined: Mon Jul 18, 2005 3:01 am
Location: AZ, USA
Contact:

Other Programs

Post by redwolf »

OTHER PROGRAMS

GIMP
Downloading Gimp:

Windows: http://gimp-win.sourceforge.net/stable.html
Also, look at the bottom of the above page for GAP (GIMP Animation Package). I only played around with it for a little bit; but GIMP + GAP looks like it can do most (if not all) of what Photoshop/ImageReady can do.

From the Gimp website:
Windows: http://www.gimp.org/windows/
MacOSX: http://www.gimp.org/macintosh/
Unix: http://www.gimp.org/unix/
Gimp from source code for various platforms: http://www.gimp.org/source/

If you browse around on the Gimp website, there are some tutorials, including ones on animations. Some of the same principles used in Photoshop surely apply to Gimp. The best part about Gimp would be the fact that it is free. 8)

pixie_princess' guide to Gimp
pixie_princess wrote:A great free tool (it's open source I think) to aid in the creation of motion gifs is called Gimp.

Personally, what I do first, is get the cel/sketch onto the computer in a digital file format.

Then I clean it up in Adobe Photoshop (currently running Elements). I do each sketch in the setup in its own layer. I line up the registration holes at the top. I make them slightly transparent to do this.

Part of the clean up process involves blanking out the while background (usually marked by X's when its in doubt between characters).
Another part is making sure the lines are darkened.

I keep a majority of the notes the animator made on the sketches.

When all this is complete, I make sure that instances where I am supposed to merge layers (hand/eye/mouth) are done on the appropriate layers.

I resize the image to a smaller size, to shorten the download time.

After all this, I save this file under a new name, and keep it as a psd file with all the layers intact/still seperate -this means there are no "partial" layers. Mouth layers are merged with Faces that are supposed to have that mouth layer.

I open this file in Gimp. Double check to make sure that they are in the correct order.

Go to filters --> Animation --> choose "Optimize for Gif"

I save it as a Gif file.
I chose the animation setting.

There is a step I may have missed in Gimp. But I think that is pretty much all there is to it. Hope it helps.
Makki's information on Gimp:
Makki wrote:http://www.nwe.ufl.edu/writing/help/gra ... tion.shtml

There’s one more thing, though. When using “The GIMP” you should optimise your animation before saving it to your hard drive. This can be done using the <Image> Filters --> Animation --> Animation Optimise function. You can either use the “replace mode”, which will replace the old frame with the new one, or the “combine method”, in which the new frame is added to the previous frame. That way only changes need to be updated. Both methods will make your files a lot smaller.
==================

More Recommended Programs

Ulead
http://www.download.com/3000-2186-5422267.html
http://www.corel.com/servlet/Satellite/ ... 5263344612

==================

Have some good information on other programs, or links to animation guides? PM them my way, please!
Last edited by redwolf on Sat Oct 13, 2007 9:02 pm, edited 5 times in total.
User avatar
redwolf
Kuwabarakuwabara - Oh My God!
Posts: 628
Joined: Mon Jul 18, 2005 3:01 am
Location: AZ, USA
Contact:

Afterword

Post by redwolf »

AFTERWORD

This guide was inspired by the request of a fellow Beta poster--thank you; you know who you are. I was surprised how much I learned in the attempt to type up this body of text meant to instruct.

When I started this tutorial, I didn't realize how complex and long it would be to write a step-by-step detailed tutorial. Since it is so freaking long, there's that many more opportunities for mistakes and inconsistencies. Please let me know if you see any!

Also, please inform me if you know of any quirks, variations, etcetera, for other versions of Photoshop.

Hopefully this thread is helpful to someone in some way!

Now, I'm off to be whipped for multi-posting. :hurt:
User avatar
transmet
Senpai - Elder
Posts: 1116
Joined: Sat Feb 21, 2004 1:37 pm
Location: shangriLA
Contact:

Post by transmet »

Excellent, excellent tutorial redwolf. Very well done. Bring in the GIMP!

(Although I've been known to use Ulead GIF Animator as well. :D)
User avatar
pixie_princess
Kamisama - God
Posts: 252
Joined: Tue Jul 05, 2005 7:44 pm
Location: USA
Contact:

Post by pixie_princess »

*WOW* Definately a very nice guide! I hope that it helps a lot of people bring life to their sketches! Thanks for writing it! :D
User avatar
redwolf
Kuwabarakuwabara - Oh My God!
Posts: 628
Joined: Mon Jul 18, 2005 3:01 am
Location: AZ, USA
Contact:

Post by redwolf »

transmet wrote:(Although I've been known to use Ulead GIF Animator as well. :D)
I've heard some very good things about that program, although I don't know much about it.

Speaking of other programs, I used a trial of GIF Construction Set a while ago, which seemed easy to use at the time, but I never used it for production artwork, only simple animations, so I'm not sure how well it would do.

Anyway, I added a couple of Ulead links in "Other Programs". :)
User avatar
RoboFlonne
Uguu...!
Posts: 3723
Joined: Thu Jun 08, 2006 12:12 pm
Location: Without Love there are no Dreams
Contact:

Post by RoboFlonne »

I think I'll have to get me a copy of Image Ready and try it out with these nifty easy to use instructions...

I've been using my gif movie gear that's like 8 years old, since I'm a little too lazy to learn image ready! /ok
User avatar
mightymask
Senpai - Elder
Posts: 973
Joined: Sat Apr 13, 2002 6:30 pm
Location: California
Contact:

Post by mightymask »

awesome - Thanks a TON. This took a lot of work -
Image
Post Reply